Today's post covers refining your outline shape - adding curves and details - as well as adding measurements and aligning. This completes the series on using Illustrator to draw knitwear schematics. The first two posts in this series covered setting up preferences and layers in Illustrator, and drawing basic outline shapes.
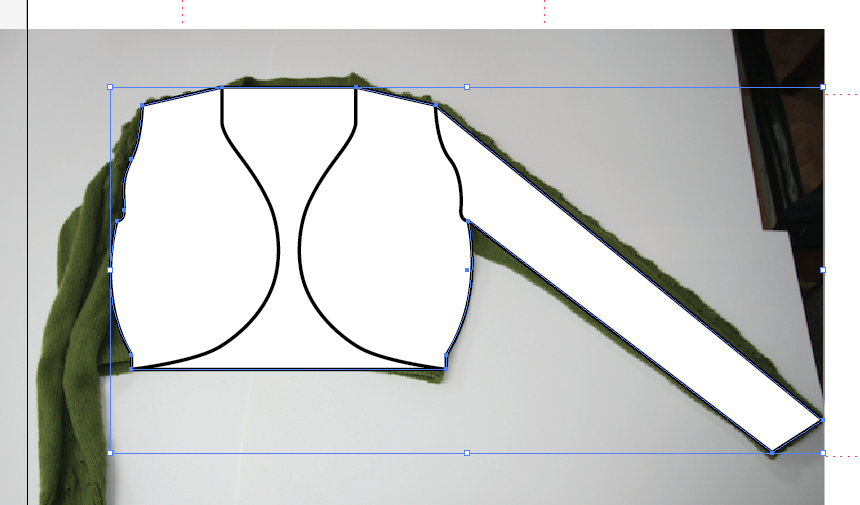
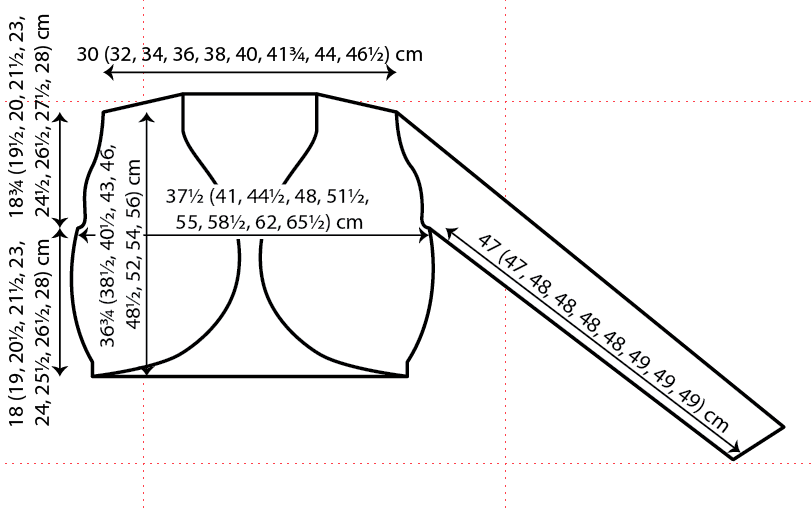
This is the basic angular outline shape for our schematic. It is the schematic for the Droplet Bolero from A Stitch in Time 2 (which should be landing on my doormat some time today or tomorrow - squeal!).
In order to add curves to the shape, we will convert some of the anchor points. So for example, at the bottom right of the diagram, we want to introduce a curve after the welt. Select the outline using the black Selection Tool, and then choose the Convert Anchor Point tool. This will be found underneath the Add Anchor Point tool that you used earlier (click and hold on the fountain pen icon to see the other options).
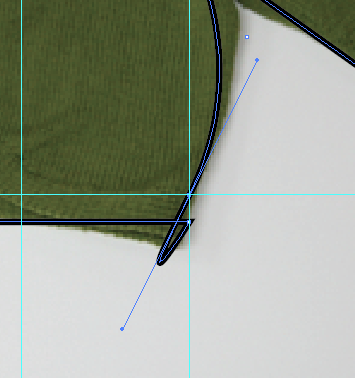
You then click on the point where you want to introduce a curve, and drag a handle out a little way from the point. Don't be alarmed when your lines look like they have "gone wrong", this is normal.
Curves are added using a Bézier tool. This is particularly brilliant, because it means that your image can be scaled as large as you wish, without pixellating. The curve is controlled at each side of the anchor point, using the two handles (shown with small blue circles in the image above).
Get a feel for how the handles control the curve by using the white Direct Selection Tool to move the handles round. Try moving them further away from the anchor point, following the same direction, and see how this changes the curve.
We only want a curve on the upper side of the anchor point, so we will first of all remove the handle on the lower side. You do this by simply picking up that lower handle, using the white Direct Selection arrow, and drag the handle back onto the anchor point. You should "feel" it snap away. Drop it there, and you will now only have a handle (and thus a curve) on the upper side of the point.
Adjust the remaining handle until you are happy with the shape of the outline. Repeat this process at all the points where you require curves. You can use guides as before to ensure that the curves are the same on both sides of the outline. Just snap the handles to guide points.
Now that the outline is complete, lock the outline layer, and unlock the detail on outline layer.
Add lines to your drawing to show details such as front openings, armhole shape, pockets etc... Use the Line Segment Tool, and set the stroke properties in the same way that you did for the outline shape.
Convert anchor points to add curves to the detail lines as you wish.
If you want to add two elements that look identical, but are mirror images of each other, then you can use the reflect tool.
Select the item you wish to reflect, using the black Selection Tool. Then go into the Object menu and choose Transform... From the submenu, you can then pick Reflect...
Choose whether you want to reflect it horizontally or vertically, and then rather than hitting OK, choose copy. This creates another object, rather than transforming the selected object.
Then simply move the new front edge line into place, using the arrow keys.
Add any other details, that you require, to the outline drawing. Then lock the detail on outline layer and unlock the outline layer.
Select the outline shape and making sure that the fill toggle is to the front, add a white fill to the basic shape.
If you are happy with the shape, then lock the outline layer and unlock the scan layer. You can now delete the photograph out of your file. Then relock the scan layer, and unlock the measurements layer, as it's time to add some arrows to the diagram.
Arrows are added very simply as lines using the line segment tool. If you hold down shift while drawing the line, it will automatically be either horizontal, vertical or on a 45 degree angle.
Once you have added the line, you can use the Stroke palette to choose its properties - thickness, shape of arrowheads and so on.
At this point it may be helpful to make the guides visible again (select Show Guides from the View menu, and Guides submenu). Be sure to use the white direct selection arrow to change the length or position of the ends of your arrows, or you will stretch them, thus making the lines different thicknesses.
Unlock the text layer, and use the Type Tool to start a text box. Simply type your measurements into the box, then choose the font and size from the Character palette.
To make your text align nicely with the arrows, you will need to choose which object is the Key Object. Once you have selected a Key Object, it doesn't move, and the other object must move to align with the Key.
Select two objects using the black selection arrow.
Then hover over the item you want to align to (in this case it's the arrow which has been carefully placed to line up with the shoulders) until you see the black arrowhead, and click on the arrow again. If you have done this correctly, the arrow (or your Key Object) will have a thick highlight over it.
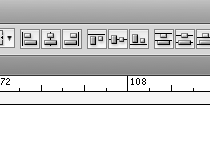
Now choose how you want the text and arrow aligned, and only the text will move. I want these horizontally centre aligned, so I click on the icon which shows the objects in that formation (second from left in the picture below).
Repeat the process, adding measurements and arrows as necessary to your diagram.
Once you are happy with your finished diagram, be sure to lock all of the layers, and make sure that they are all set to be visible.
You can then choose to output your diagram in a wide range of formats. If you are working on an InDesign file for your pattern, the Illustrator file can be placed straight into it. Alternatively, you can choose from png/pdf/tif/jpeg/windows meta file and many other formats for your finished schematic.
Please don't hesitate to leave a comment if you have any questions. I hope that this series has been useful.
Jen x


