

I have some finished socks to show you, and oh are they bringing me joy!
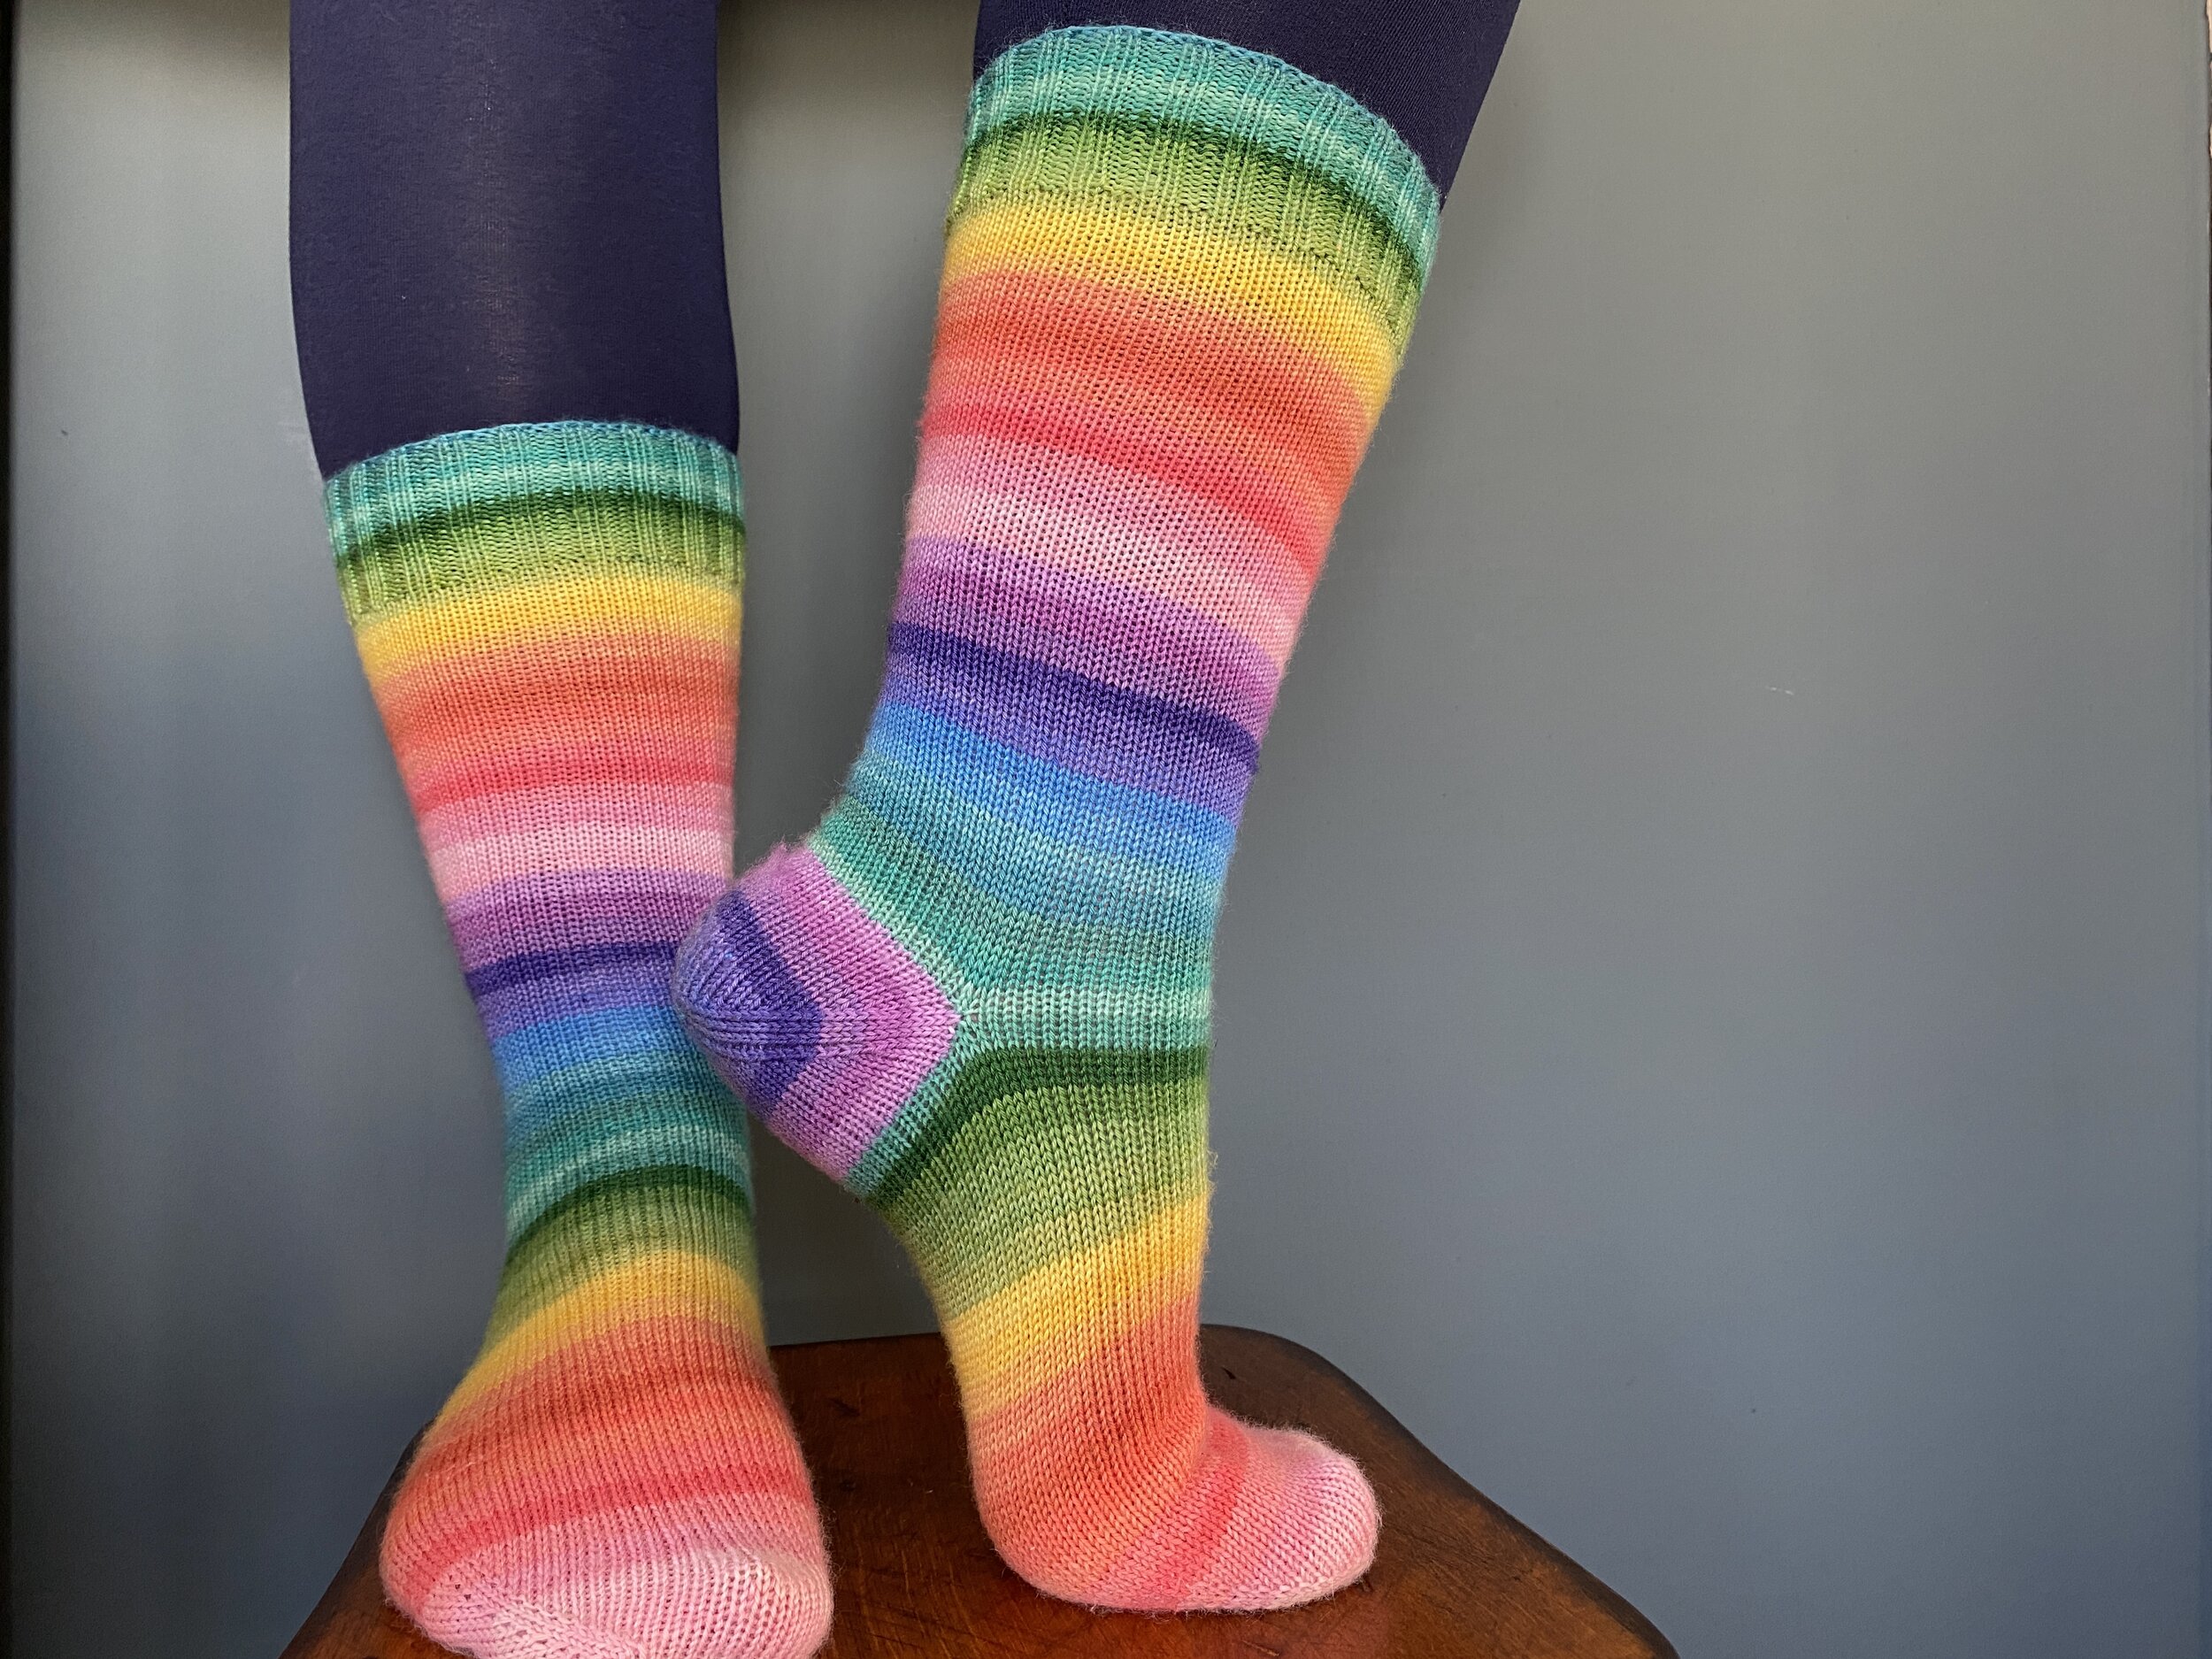
It’s no secret that I am absolutely, utterly, incandescently in love with the genius that is Fab Funky Fibres. This is my sixth (!) pair of FFF socks, and I’ve got no intention of stopping anytime soon. Especially as I’ve recently taken delivery of this totally swoon-worthy Come Together set, as a birthday treat! Rainbow socks for the whole family!
Despite the fact that I pretty much always have a pair of socks on the needles, this was my first pair of toe-up socks in a while. Toe-up socks are particularly fab when you want to make the most of a special skein of yarn. If you have a set of kitchen scales handy, you can simply divide your skein in two and just knit, knit, knit until you run out of yarn – keeping in mind that if you’re making very tall socks, you might need to work some increases at a point to make space for your calves. Elaine and Alex of Fab Funky Fibres make this particularly easy. When you buy 100 grams of sock yarn from them, it’s sent as two identical 50 gram skeins … no need to divide the yarn yourself, or even worry about what stripe you’re starting on. They’ve done the work for you (one of the many reasons to love them).
Toe-up socks are also nice if you’ve not worked out your optimal sock stitch count as you can just try them on as you go. Cast on the toe, start your increases and try on as often as you please until you’ve landed on the right number of stitches. Easy peasy!
I tend to start my toe-up socks using Judy’s Magic Cast On, but as we mentioned in last week’s blog post, other cast ons are available… If you find managing JMCO awkward, you can cast on with a crochet provisional cast on then graft your toe together later, just as you would for a top-down sock. Or if you are a fan of a rounder toe, you could give the pinhole cast on a try, working evenly spaced increases around the whole circumference of the toe (rather than just at the sides). As with all things knitting-technique related, it’s worth trying out a few things and seeing what works best for you, both in terms of process and product.
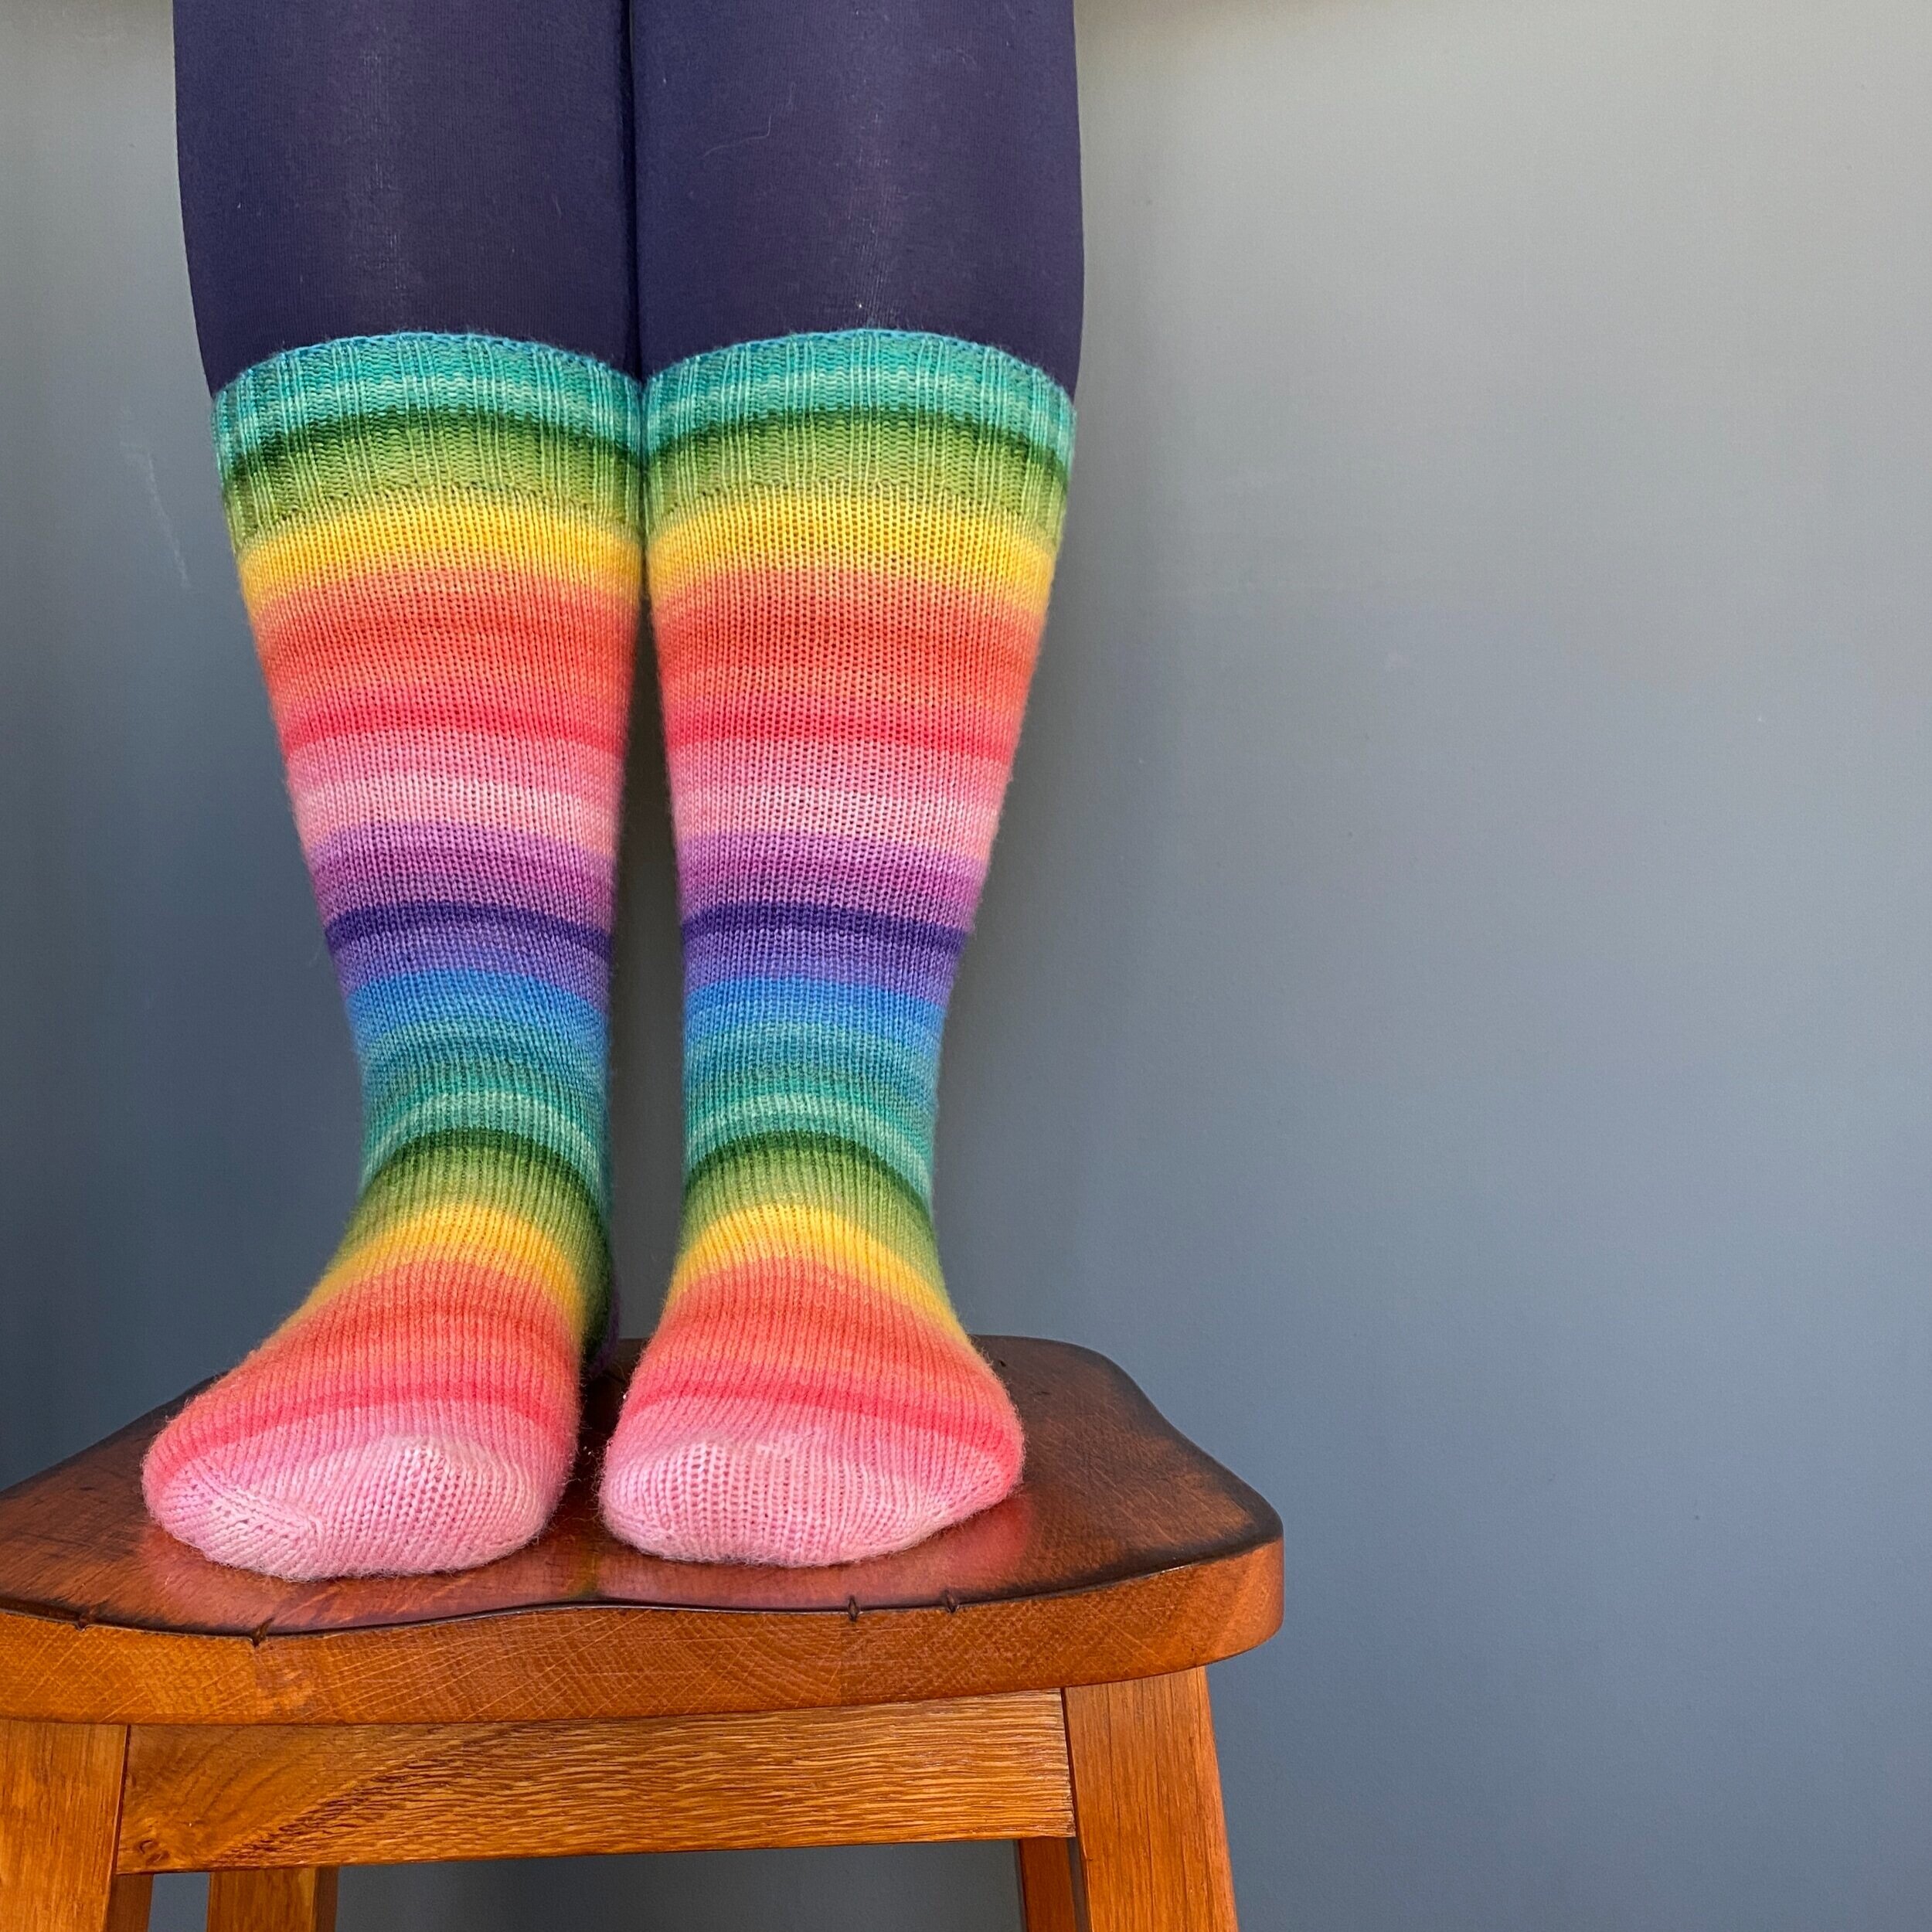
I worked the heels as true afterthoughts, following the process outlined in this blog post: Inserting a True Afterthought Heel And once the legs of my socks were around 15cm [6in] tall, I started to add extra stitches for my calves. I squeezed every last stripe of yarn out of my skeins, and now I have lovely long socks to keep me warm.
Just in case it isn’t obvious, I’m mega-pleased with these toe-up Adventures Over the Rainbow socks of joy! Perhaps you’re feeling ready for a toe-up adventure too? You can find all our sock knitting tutorials right here, including videos covering heel options for toe-up socks. If you’ve not tried it before, it can be really freeing to knit a plain sock with no pattern (just keep notes as you go if you’re not knitting your socks simultaneously). Or if you’d like a bit more structure to your sock knitting adventure, we’ve got some copies of MDK Field Guide No. 11: Wanderlust in the online shop which includes recipes for toe-up and cuff-down socks by Wendy Bernard, with lots of different stitch patterns!

Toe-Up Panel Socks by Wendy Bernard from MDK Field Guide No. 11: Wanderlust.