

We’ve been so excited about the release of Natalie Warner’s Unite Sweater and Reunite Cardigan here around A-C Knitwear HQ, and we’ve loved seeing people’s enthusiastic response to this pair of gorgeous garments. Have you cast on? Are you planning to? Well today I have a simple tip for you, something you can do before you cast on your first stitch (though if you’ve already cast on, it’s not too late) that will set you up for sweater greatness.

What I’m going to suggest is you grab a highlighter and a pen or pencil and go through your pattern, highlighting all the instructions that pertain to your size. So, after you choose (referring to the sizing information) which of the sizes 1-10 you’ll be making, literally get the highlighter out and, every time you come to a line of numbers, highlight or circle the one that corresponds to your size. It might sound a little basic or boring, but if it’s not something you already do, I can tell you, it’s going to improve your garment knitting experience. The Unite Sweater and Reunite Cardigan patterns are written for ten sizes, and, whether you’re a newer knitter or a more experienced one, it’s very easy to get lost in the lines of numbers. Marking out your size beforehand will make referring to the pattern quicker and easier and lessen chances for mistakes!
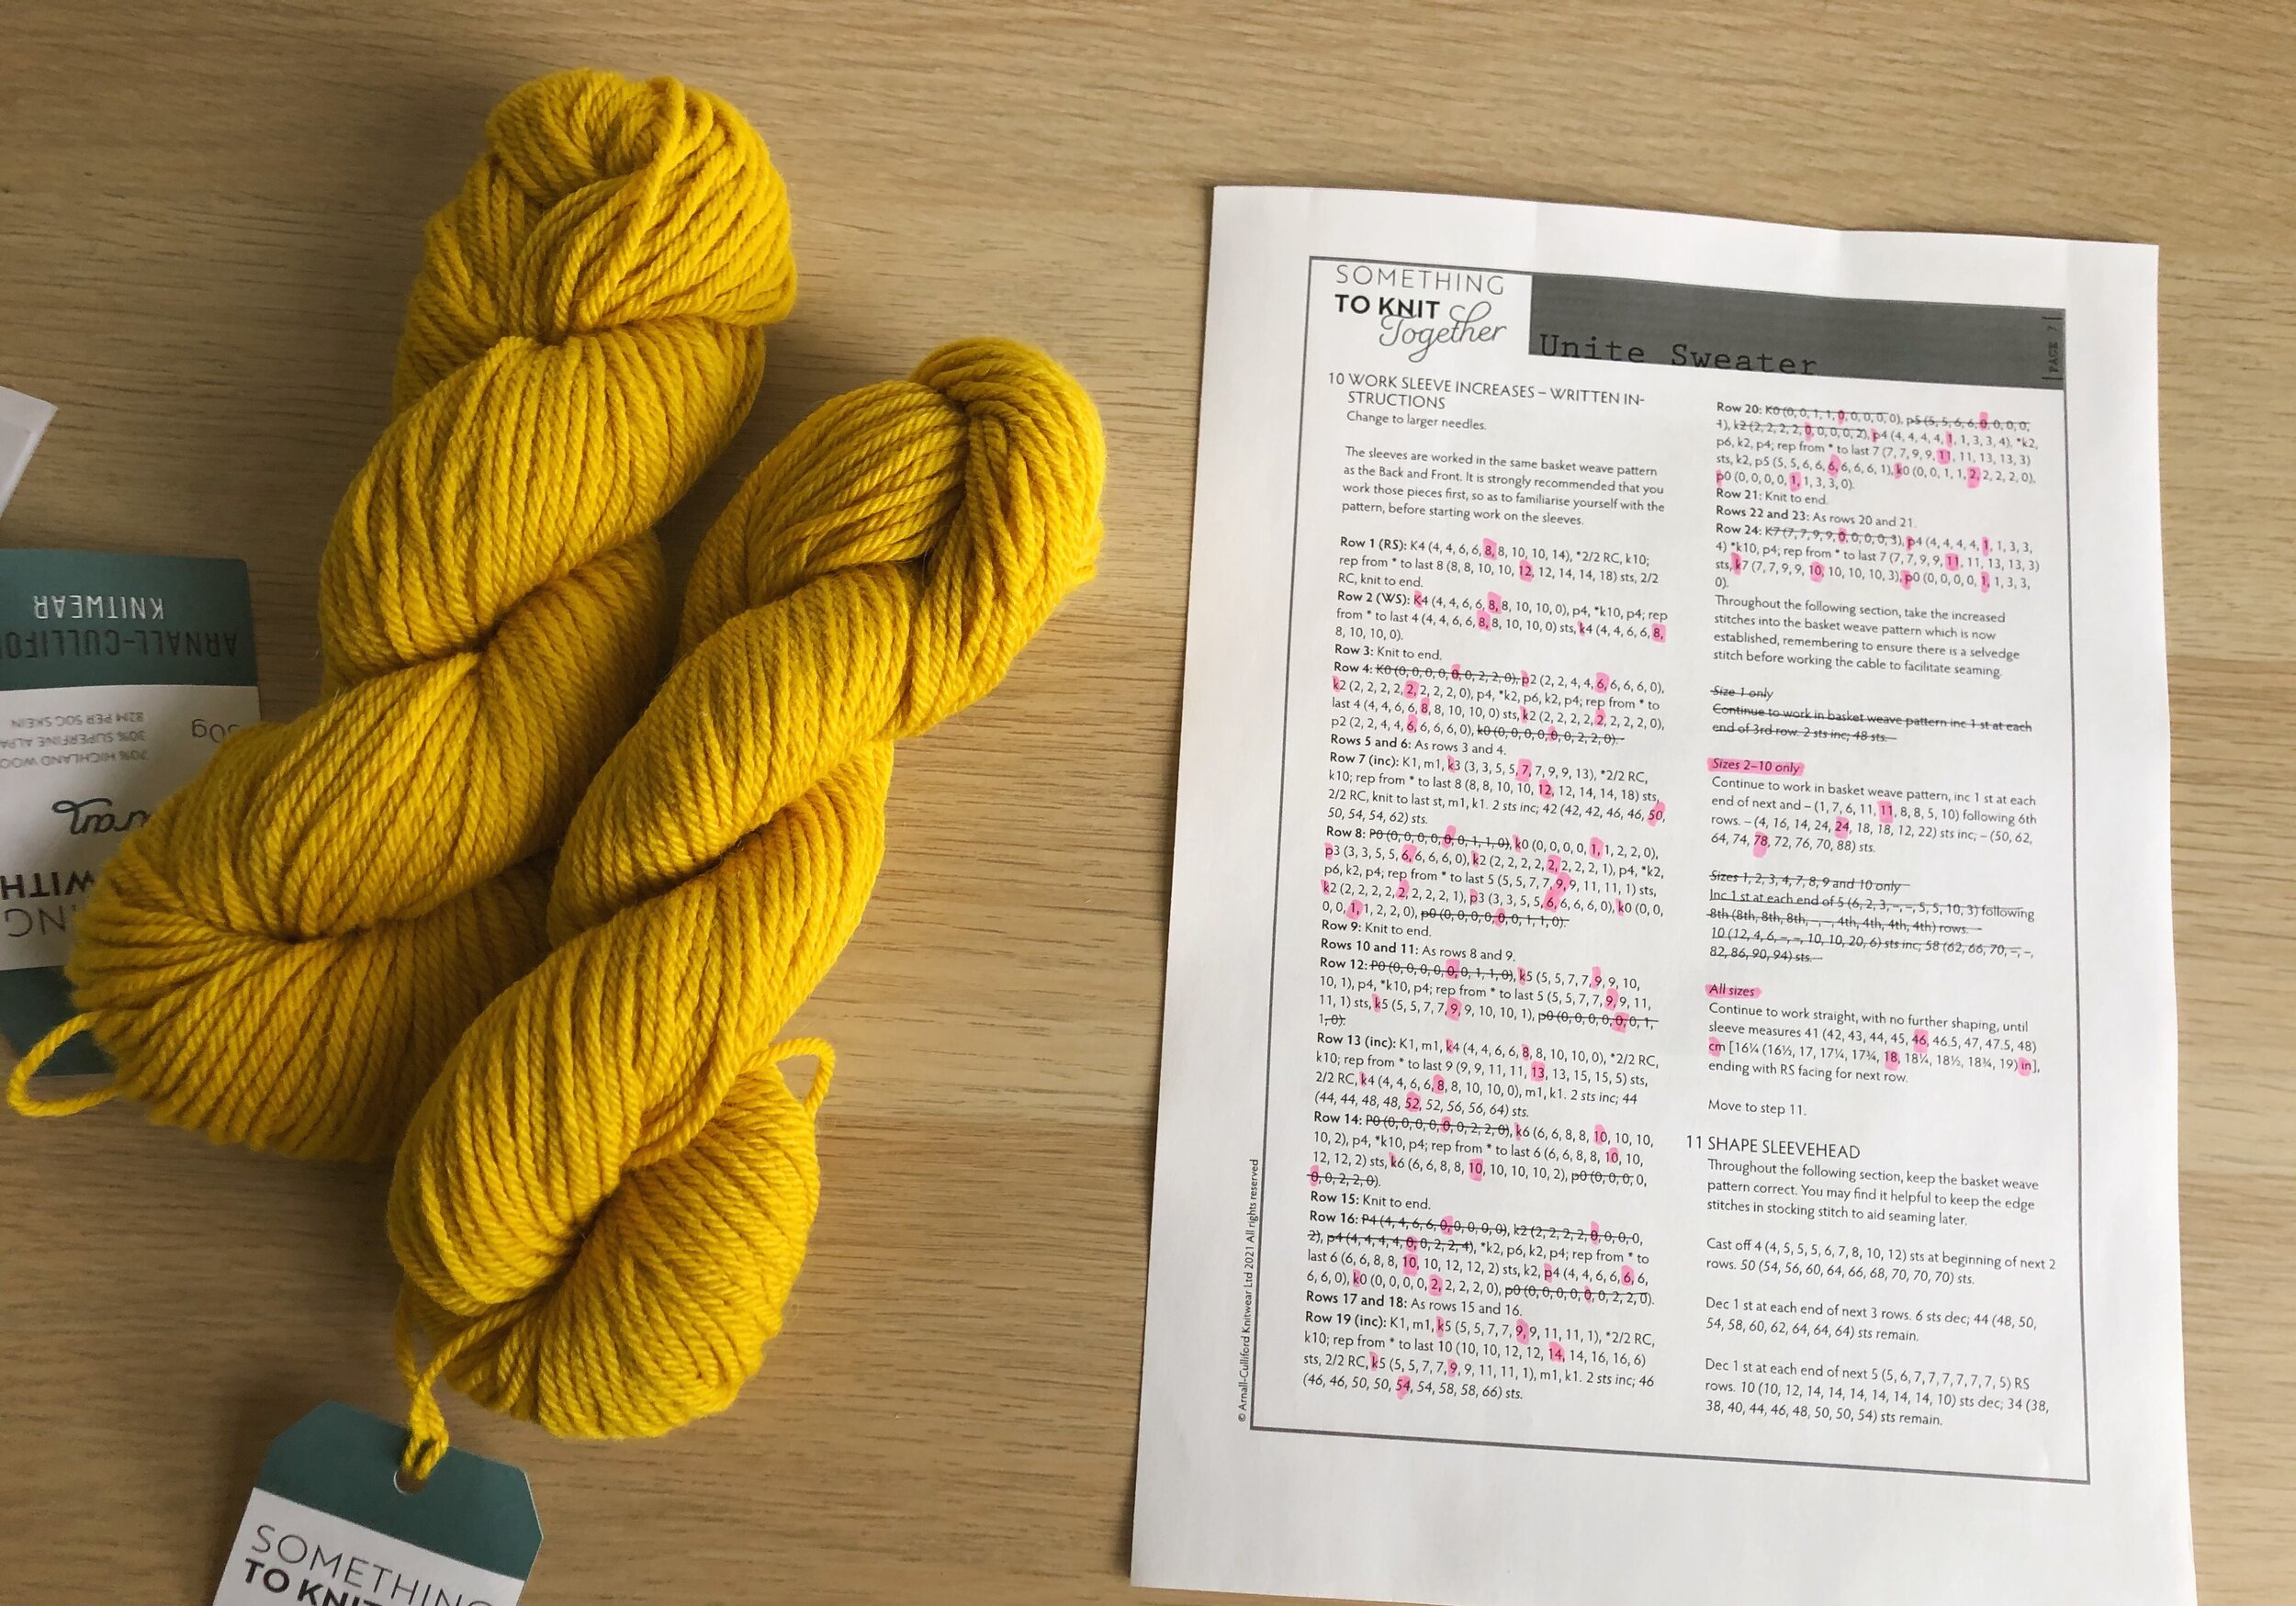
Above is a sample page from the written instructions of the Unite Sweater that I’ve marked up for the Size 6. At first glance, this page seems like a sea of numbers and could feel a bit intimidating to parse. So I’ve gone through and highlighted the 6th number in each set of numbers (to correspond to size 6). When I come to an instruction to do something, but the corresponding number for Size 6 is zero, I’ve crossed out the instruction entirely. Doing this distills the pattern down to just the numbers I’ll need. We can take a closer look:

Row 16 is a great example of how much simpler things get if you highlight what’s relevant and cross out what’s not. To cover every size it reads:
Row 16: P4 (4, 4, 6, 6, 0, 0, 0, 0, 0), k2 (2, 2, 2, 2, 0, 0, 0, 0, 2), p4 (4, 4, 4, 4, 0, 0, 2, 2, 4), *k2, p6, k2, p4; rep from * to last 6 (6, 6, 8, 8, 10, 10, 12, 12, 2) sts, k2 (2, 2, 2, 2, 2, 2, 2, 2, 0), p4 (4, 4, 6, 6, 6, 6, 6, 6, 2), k0 (0, 0, 0, 0, 2, 2, 2, 2, 0), p0 (0, 0, 0, 0, 0, 0, 2, 2, 0).
As you can see though, the first three directions from Row 16 for size 6 are P0, K0, P0. So I’ve crossed them out entirely. Same goes for the last instruction to purl. And then I’ve highlighted the remaining relevant numbers. So, if I focus just on the highlighted bits, I’m left with a row that reads:
Row 16: *k2, p6, k2, p4; rep from * to last 10 sts, k2, p6, k2.
This works really well for line-by-line instructions, but also helps make sure you don’t neglect any directions that apply to only certain sizes or accidentally follow ones that aren’t relevant for your size.

So if we carry on digging into the sleeve instructions, we can see that there’s a set of directions that reads ‘Size 1 Only’. These don’t apply to me, so I’ve crossed them out. I’ve then highlighted the instructions that apply to Size 2-10 (highlighting the relevant numbers), crossed out the next set of directions as they don’t apply to Size 6, and then also highlighted where the instructions resume for ‘All sizes’. Doing this creates a personalised road map through the pattern — one that your eyes will thank you for when it’s 11 pm and you’re staring at your pattern, just trying to finish a little more of your beautiful WIP!
Investing 10 or 15 minutes to read through the pattern and mark up your size will, I promise you, repay you in saved time and avoided mistakes. It’s something I often forget to do when I start a project, then kick myself when I get to the end of a row only to discover I accidentally worked the row looking at the numbers for an adjacent size.
And if you do decide to mark up your (Re)Unite pattern before you start, just remember that many sections of the pattern give you the option of written or charted instructions — so decide which you’ll follow and mark accordingly! And while we’re on the subject of written v. charted instructions, do remember that if you are following written instructions and get a bit stuck, it’s always worth having a peek at the charts. Even if reading charts isn’t your cup of tea, you might find it easier to check if, say, your stitches are lining up as they should, by looking at the charts.

Photo Credit: Jesse Wild.
I hope you’ve found these pattern management tips useful and they help you crack on with a beautiful sweater project! If you’d like to share your progress, we’d love to see it over on The Knitalong Hub! And if you’ve not got your copy of Something To Knit Together Winter Edition yet, you can find the eBook and all the scrummy Something To Knit With Aran you’ll need for the project over in the online shop (where we also have yarn kits!).