

There comes a time in every knitter’s life when they have to make a decision: can I squeeze one more repeat out of the yarn I have left or do I bind off now? The latter option promises safety and security from that most unpleasant of sensations: running out of yarn halfway through the bind off. But the former holds out the satisfaction of using up as much yarn as possible — particularly tantalising when using a treasured skein of yarn and also pleasing in its avoidance of unnecessary leftovers. What’s a knitter to do? Today’s tip saves you from having to make such a choice … no scales, no tools required, all it takes is a little knot!
Read moreRavelry how-to: Adding project photos
We’ve been having a fab time over in this month’s Boost Your Knitting knitalong, which celebrates the tuck stitch! We realize though that, if you’ve never uploaded photos to Ravelry, you might be a little unsure how to add them to your project page and share your progress in the group. Since we’re all about learning new things, we’ve planned a few posts for the next few weeks taking you step-by-step through some of the finer points of Ravelry. Today, we’ll look at how to add photos to your Ravelry project page.
Read moreVideos: Opening and Closing Knot Cables

Pleione Cowl by Lucy Hague; Photo ©Jesse Wild
Three videos in one post: learn how to work a 1-into-5 increase and 5-into-1 decrease for making knot cables and also how to fix mistakes in stocking stitch.
Read moreHow to Care for your Handknits
Please don’t talk to me about the two months I spent knitting a pair of Glynis socks by Cookie A, only to felt them on the first wash: it’s still painful 7 years later! Having spent hours (sometimes even years!) knitting a beautiful design, it’s vital that the finished item is properly cared for. There’s little in knitting that is more distressing than ruining something that you’ve spent so long creating. Whether it’s spillage of bolognaise sauce down a child’s jumper, or the dreaded moths nibbling a hole in a treasured Fair Isle sweater, this article will help you to avoid some of these pitfalls.
Read moreUsing Ravelry part 2
There are so many different ways to use a website like Ravelry. Many people visit only to purchase patterns, while others use it to keep track of their projects, yarn and books, and still more use the forums to chat online to like-minded crafters. However you choose to use Ravelry, I hope that some of the hints and tips in this article might come in handy.
In the first part of this Masterclass series, we looked at the information you can store in your Notebook section of Ravelry, as well as how to use the Pattern and Yarn databases. In this instalment, we will focus on the social side of the website.
Read moreHow to: Hexa Hap tutorials
One of the joys of knitting is that once you have mastered a technique, or found your perfect pattern, you can keep on going happily as long as you please. Equally, you could find a pattern you long to knit and discover that you need to learn something new in order to make any progress. It's the latter of these that keeps us interested in what we do as neither of us, me in particular, can say we know about, and can do absolutely everything possible with needles and yarn.

Image © Kate Davies Designs Ltd
Tom van Deijnen's Hexa Hap from The Book of Haps cleverly relies upon repeating the same sequence throughout to produce a fully reversible fabric. It also employs a couple of techniques that may be less familiar, so we have produced these short videos to help you to get to grips with them.
First is the intarsia twist, which gives a smooth, reversible transition between the two shades of yarn:
Hexa Hap is modular in that you work a triangular wedge at a time and then pick up stitches for the next wedge. Here's how to pick up the stitches:
I do hope that you will find these tutorials helpful. You can see more over on our YouTube channel: Arnall-Culliford Knitwear on YouTube
How to: Nut-Hap tutorials
I absolutely love to learn new techniques. I'm a sucker for a nifty way to make things, and I love to finesse my knitting. Sometimes it can be overwhelming to look at a new pattern and realise that it includes a heap of things you've not done before, so we aim to hold your hand with some of these techniques.

Image © Kate Davies Designs Ltd
My Nut-Hap design for The Book of Haps features a few tricks to give a really polished finished scarf. First up is the tubular cast on - my all-time favourite way to give your knitting a professional finish. Here's our YouTube video to talk you through how to work the cast on:
Nut-Hap then uses tucks to create an architectural shape to the lower edge. These are worked in with the ribbing of the body, and we've made videos to show you how to do the separating row:
And another video to show you how to work the joining row:
I do hope that you will find these tutorials helpful. You can see more over on our YouTube channel: Arnall-Culliford Knitwear on YouTube
How to: Add tucks to your knitting
To complement the pleats tutorial from last week, here is a how to video on working tucks in your knitting. If you've ever wondered what the difference is between pleats and tucks, this will explain all (or is it just me that thinks about these things?). I adore the generous texture that tucks can add to knitted fabric. My Nut-Hap for The Book of Haps features a tucked edging, which is worked in a slightly different way - more on that another time.

I am busy planning our next lot of filming for next week, so do let me know in the comments if there are any techniques you'd like to see us feature.
This video covers the following areas:
What is a tuck? What's the difference between a pleat and a tuck?
How to pick up stitches for a tuck.
How to work a tuck joining row.
Ysolda Teague's Ripley Hat pattern uses tucks.
My Nut-Hap uses tucks worked in a slightly different way.
The cowl I'm wearing in this tutorial is my Knotted Kernel design.
Photos © Kate Davies Designs Ltd
Video © Arnall-Culliford Knitwear Ltd
How to: Add pleats to your knitting
We're back with our first tutorial video! This is about how to add pleats to your knitting. It was shot at the same time as my introduction to Theme and Variation that I posted a couple of weeks ago, so doesn't reflect any of the kind feedback we received. We will work those tweaks in when we do our next lot of filming in July! I do hope you'll enjoy the tutorial, and find it helpful.
The video covers the following areas:
What is a pleat?
Underlay, turnback and overlay.
Setting up your fabric to add structure to your pleat.
How to prepare the stitches for joining in the pleat.
Joining 3 sets of stitches.
Pleats are featured in Turmeric by Veera Välimäki and Manu by Kate Davies.
And finally, I am wearing my Knotted Kernel cowl, which is my own design (but includes no pleats!).
We'll be back tomorrow with a round-up from our Hapsarehappening Knitalong over on Ravelry, and we'll be awarding the first work in progress prizes, so get your project photos up in the group. There are some truly stunning projects in the making!
Coronation Knits: The Short Row Files
Today's post follows quite nicely from the theme of Thursday's post: 'things I learnt from technical editing jobs'. I'm delighted to be taking part in the blog tour for one of latest projects I've worked on, Coronation Knits by Susan Crawford. Susan has kindly offered a copy of Coronation Knits as a prize to one lucky reader, so read to the end for details of how to enter the giveaway.
There are going to be lots of posts about the beautiful designs in the collection, and the influences behind them, so today I thought I would take the opportunity to talk a bit about short rows. Bear with me. If you've not yet come across short rows, fear not, I shall walk you through them. Short rows are exactly what the name suggests - rows (or rounds) where you don't knit all of the stitches. If you work half way through a row, turn and work back to the end, and then carry on as normal, you will have slightly more fabric on one side of your piece. You will also have an unsightly hole at the point where you turned. Short-row shaping is actually very simple - it lets you add more fabric in specific areas and thus can create 3-dimensional shape in your knitting. The trick involves closing up the holes that form when you turn.
© Susan Crawford, 2012
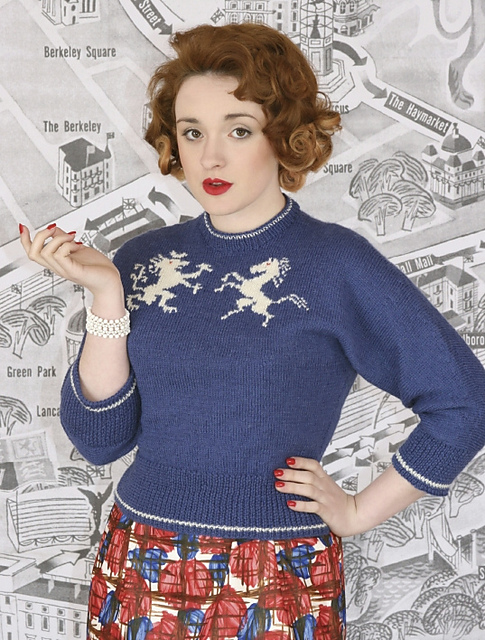
There are three designs in the book that feature short-row shaping: Lion and Unicorn (above), Blue Riband Hat and Retro Jubilee Socks (those are all Ravelry links).
The Lion and Unicorn jumper was my first love in the collection - it was the first design we worked on, and the elegance of its shape and design really appeals to me. The pattern is based on a design from the Special Coronation Edition of Stitchcraft magazine (1953), where the jumper is knitted in two pieces (front and back). The shoulders were shaped with a long series of cast-off rows, thus giving the original design a seam along the top of the shoulder and sleeves. When Susan started looking at updating the jumper (and adding all the additional sizes - the original is 1 size only), she decided that it would work really well knitted in one piece from front to back, with the shoulders shaped instead by short-rows, thus eliminating the seam. Susan isn't a designer who gets rid of seams willy-nilly - in fact, she's a great proponent of the benefit of seams to provide structure and good fit in garments - so when Susan gets rid of a seam, you know that there's an excellent reason for it! The smooth slope of the shoulders and sleeves is just so pleasing - a seam would really mess up that line in my humble opinion.
Lion and Unicorn uses probably the most common short-row turn method: wrap and turn (w&t). There are lots of tutorials for working wrap and turn short rows, so here are a couple to get you started:
Working the wrap and turn itself (a video from Knitting Help)
Knitting the wrap with a stitch (another video from Knitting Help)
Working the wrap and turn and knitting them together on following rows (a photo tutorial from Purl Bee)
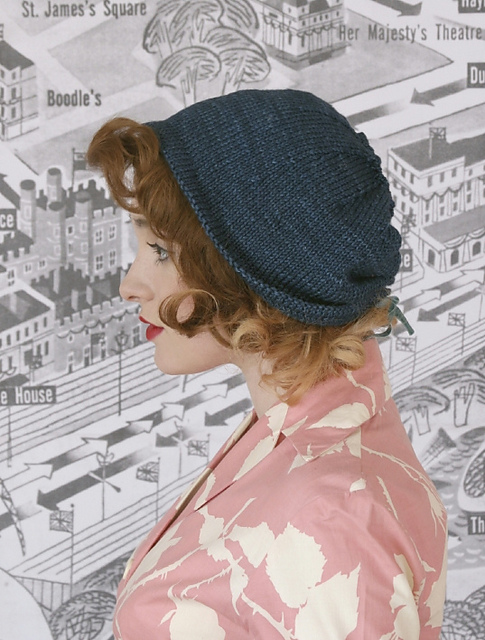
© Susan Crawford, 2012
The stylish cloche hat, Blue Riband (above) also uses the wrap and turn technique - this time working in the round. Short-row shaping is used here to add extra length to the back portion of the hat (this same method is often used to add height to the back neck for yoked jumpers). The basic premise is exactly the same as above, it's just that you are working in the round, rather than flat. If you are finding that your wraps aren't completely concealed when you work back over them, try knitting the wrap and stitch together through the back loop.
Which brings us nicely to the Retro Jubilee Socks and the new thing I learnt. These socks feature a new-to-me technique for working the short rows in the heel - the slyo or slipped yarnover method. A quick search on Google revealed only a few references to this technique, and no proper tutorials (although I feel sure there must be some out there somewhere - do leave a link in the comments if you find one and I'll add it here), so I thought it might be handy to walk you through it.

© Susan Crawford
The cuff and leg of these socks are knitted in the round as normal, and in essence the heel is a standard short-row heel, it just uses a different method for closing the holes on turning. The following short video takes you through the process.
The next stop on the blog tour is Hélène Magnússon (The Icelandic Knitter) on Monday 18th June 2012. Make sure to stop by!
If you can't wait to get your hands on a copy of Coronation Knits you can purchase the collection in the following ways:
Print Book for £12.99 or eBook for £10 both available from Susan Crawford.
Susan has kindly donated a copy of Coronation Knits for one lucky reader (there are giveaways on many of the stops on this blog tour, so do check them all out - full details below). To enter the competition, please leave a comment on this blog post, and tell me what your favourite knitting technique is and why (comments not including this information will be excluded from the selection of the winner). One reader will then be chosen at random from the eligible comments on this post. The prize can be sent anywhere in the world. Only one entry per person please - duplicate entries will be deleted. Comments will close automatically exactly 1 week from publication of this post. All prizes will be sent out after the blog tour is complete at the end of July 2012.